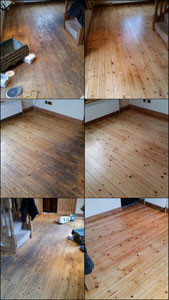
How to Sand Wooden Floors
January 15, 2018
When looking for tips on floor sanding services there is often a range of detailed and complicated information. The likelihood is that you will be left so confused that you will be put off the process. There is absolutely no reason as to why this should happen.
There is a lot of information available. However, it is our responsibility to make sure that you are made aware of the details you need and that you are not bothered with all of the rest. This is how we have built up our reputation. We offer an exceptional service, providing brilliant finishes accompanied with details that benefit our clients.
 We compiled a 10 Step Process to restoring wooden floors;
- Step 1 – we make sure all nails are tapped down. We remove any loose grit and remove door strips
- Step 2 – to check there are no loose boards and secure where necessary
- Step 3 – we start the sanding process with our dust free belt sander. If the floor is uneven we will start at a forty-five degree angle straightening up till we are happy the floor is even and any indentations are removed. We will then go along the boards going up through 4 or 5 different grits off sand paper until we are happy with the finish
- Step 4 – an edger is then used to reach the bits that could not be reached with the belt sander until we are happy of a good finish along the edges
- Step 5 – all corners are scraped or sanded
- Step 6 – an orbiter sander is then used on the edges to achieve the best finish possible
- Step 7 – a rotary machine is then used with a multi hole pad to achieve the smoothest finish possible
- Step 8 – a primer is applied. Once dried, the first coat of finish is applied and left to dry until the next day
- Step 9 – a rotary is then used to flat back the floor and create a good surface for the last 2 coats
- Step 10 – the last two coats of finish are applied
If you would like our help to restore your wooden floors call us today on 0845 4599941.
Previous
